Before we look at how you can use the Graduated Filter tool to improve your images, you may want to think about the style in which you’d like to process the photo. What is your ultimate aim? My article Finding and Achieving Your Style in Lightroom will give you some advice on figuring that out. Once you know what you want to do, the rest falls into place.
How to use Graduated Filters
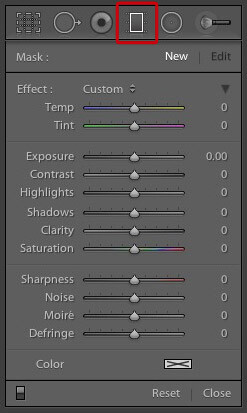
This is how you apply a Graduated Filter in Lightroom
1. Click on the Graduated filter icon underneath the Histogram (the keyboard shortcut for it is “M”). The Graduated filter panel opens up beneath, revealing the sliders that you can adjust.2. Hold the left mouse button down and drag the mouse across the image to place the Graduated filter. In this example I held the mouse button down while I dragged to create a wide Graduated Filter. There is a lot of space between the lines making up the filter, indicating that it will create a smooth graduation.
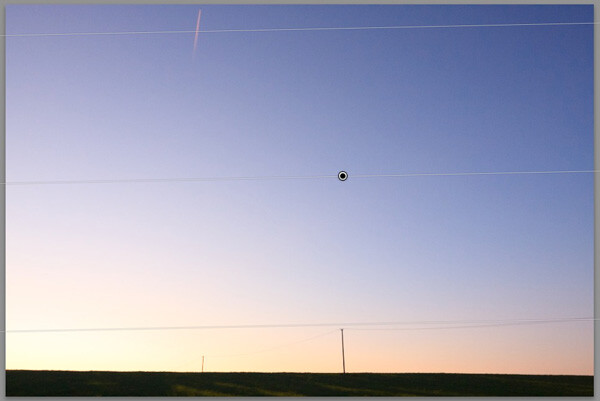
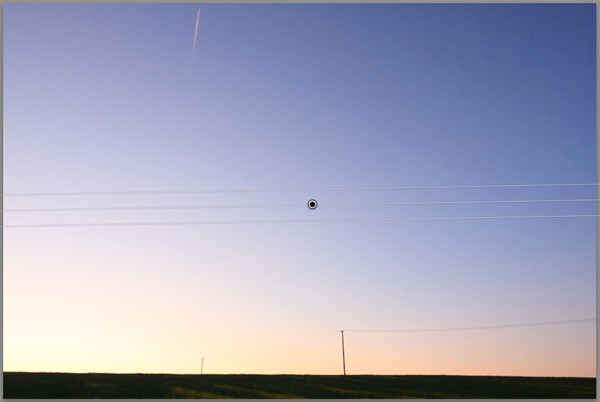
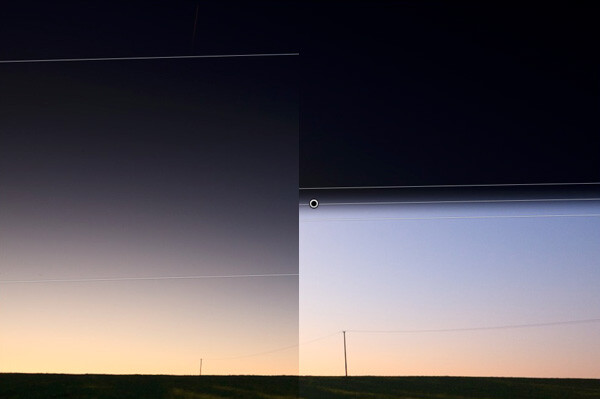
This
illustration shows the difference between creating a wide Graduated
Filter (left) and a narrow one (right). Experiment with both to see how
they affect your photos.
Note: you can reposition the placement by dragging the pin, or widen the gradation any time even after applying the filter. Just reactivate it, select it (the dot will be black) and adjust. To adjust the gradation just hover the mouse over one of the edges, click to grab it, hold down the mouse button and pull to widen or narrow the spread.
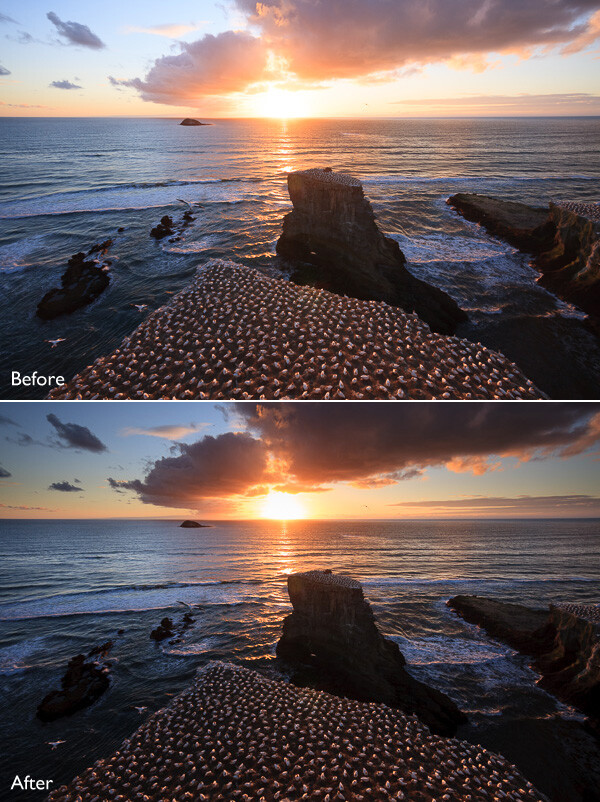
1. Making skies darker
Let’s start with the obvious application of using the Graduated Filter to make the skies in landscape photos darker. Note that the Graduated Filter can’t rescue you if the sky in your photo is so overexposed that detail is lost – you may still need to use a neutral density graduated filter when you take the photo in the first place.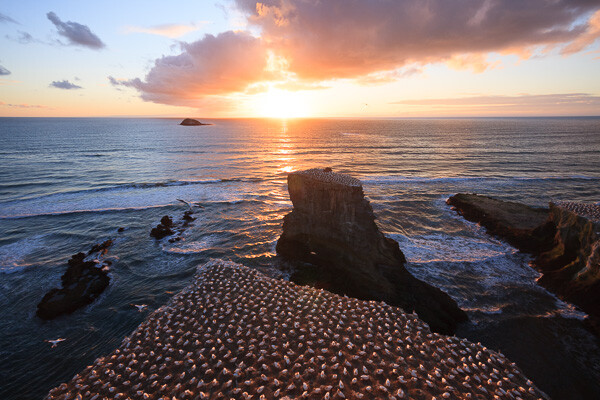
Starting image
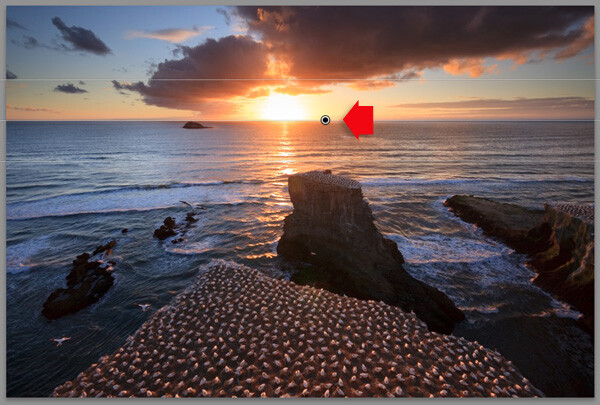
Exposure -1.81 applied using the Graduated Filter
2. Adjusting Contrast and Clarity locally
My aim with this landscape was to make the foreground darker and sharper, directing the viewer’s gaze towards the horizon. I achieved this by adding another Graduated Filter from the bottom. But this time, as well as adjusting Exposure to -0.79, I increased Contrast to +20 and Clarity to +27: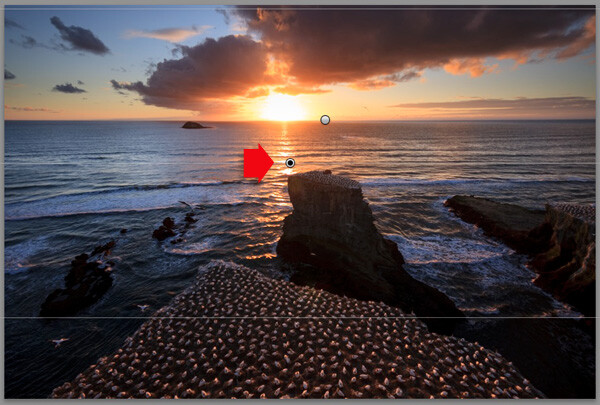
Bottom Graduated Filter applied, Contrast +20 and Clarity +27
3. Adjusting White Balance
Another use of the Graduated Filter is to adjust colour temperature in part of the image. Sticking with the same landscape photo, I selected the top Graduated Filter to activate it and set Temp to 30. This warmed up the sky, emphasising the deep orange and red colours of the sunset: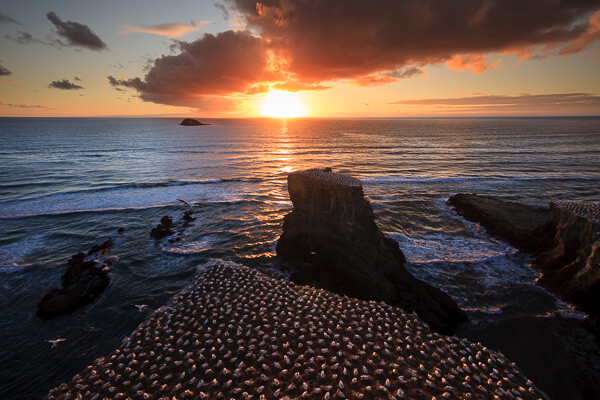
4. Making edges of your image darker
Moving away from landscapes, Graduated Filters are a handy way of making the edges of your images darker. This helps direct the viewer’s attention towards the focal point.
5. Adding a colour wash
The Color setting at the bottom of the Graduated Filter panel lets you add a tint. It is laid over the filter in addition to the effects created by whichever sliders you choose to adjust. To select a colour, click on the colour picker icon at bottom of the Graduated Filter panel (the white rectangle with black cross inside indicates no colour has been selected) and select the colour you wish to add: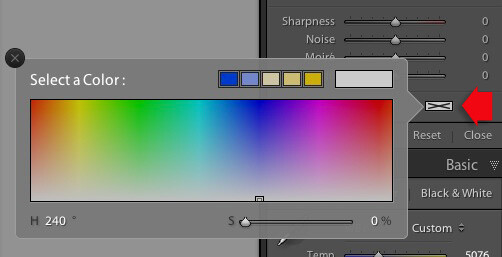
Slider below is for adjust the Saturation of your selected color
6. Lens blur effect
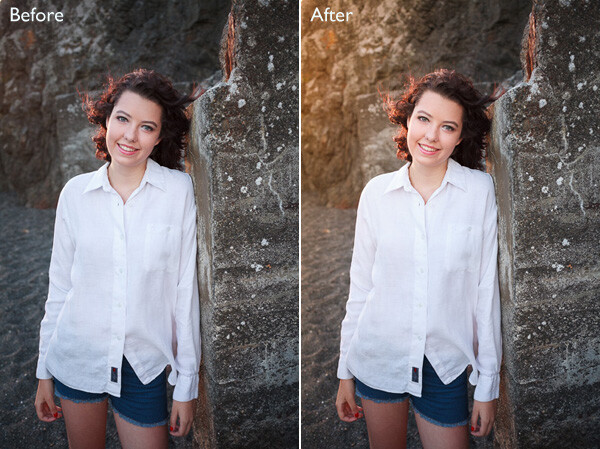
The Sharpness slider in the Graduated Filter panel is dual purpose. From zero to -50 it reduces sharpness. From -50 to -100 it creates lens blur. This lets you replicate the effect of using a tilt-shift lens or large format camera to create a photo with a tilted plane of focus. This is what it looks like. You may have to look closely – the model’s head is sharp but the areas at the top and bottom are not.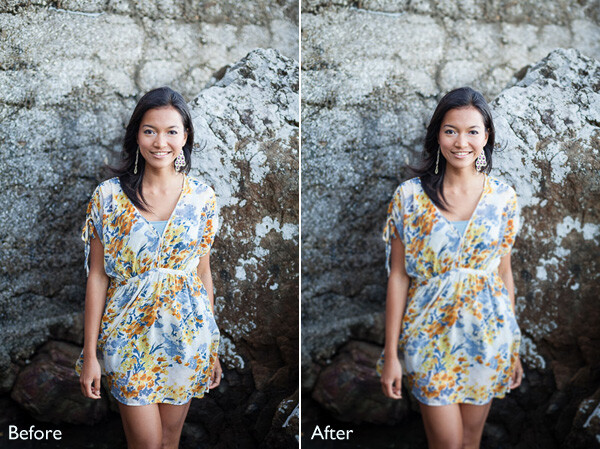
I created this effect by adding five Graduated Filters, two at the top, and three at the bottom, their position shown by the coloured lines. The effect works best with a narrow Graduated Filter.
source : Digital Photography School
Tidak ada komentar:
Posting Komentar